What Is the Customization Process for Custom Notebooks? A 2026 Manufacturing Guide
A deep dive into the manufacturing physics of bespoke stationery. From the 6-layer anatomy of a hardcover notebook to the difference between debossing and foil stamping.
Expert Quick Answer
The customization process for bespoke notebooks involves six distinct manufacturing stages: Material Selection, Block Printing, Cover Assembly, Branding Application, Binding, and QC. Unlike "off-the-shelf" overprinting (which just stamps a logo on a finished book), true bespoke manufacturing builds the product from raw materials up. This allows for deep customization options like Pantone-matched elastic bands, custom watermarked paper, and edge printing, but requires a standard lead time of 4-6 weeks.
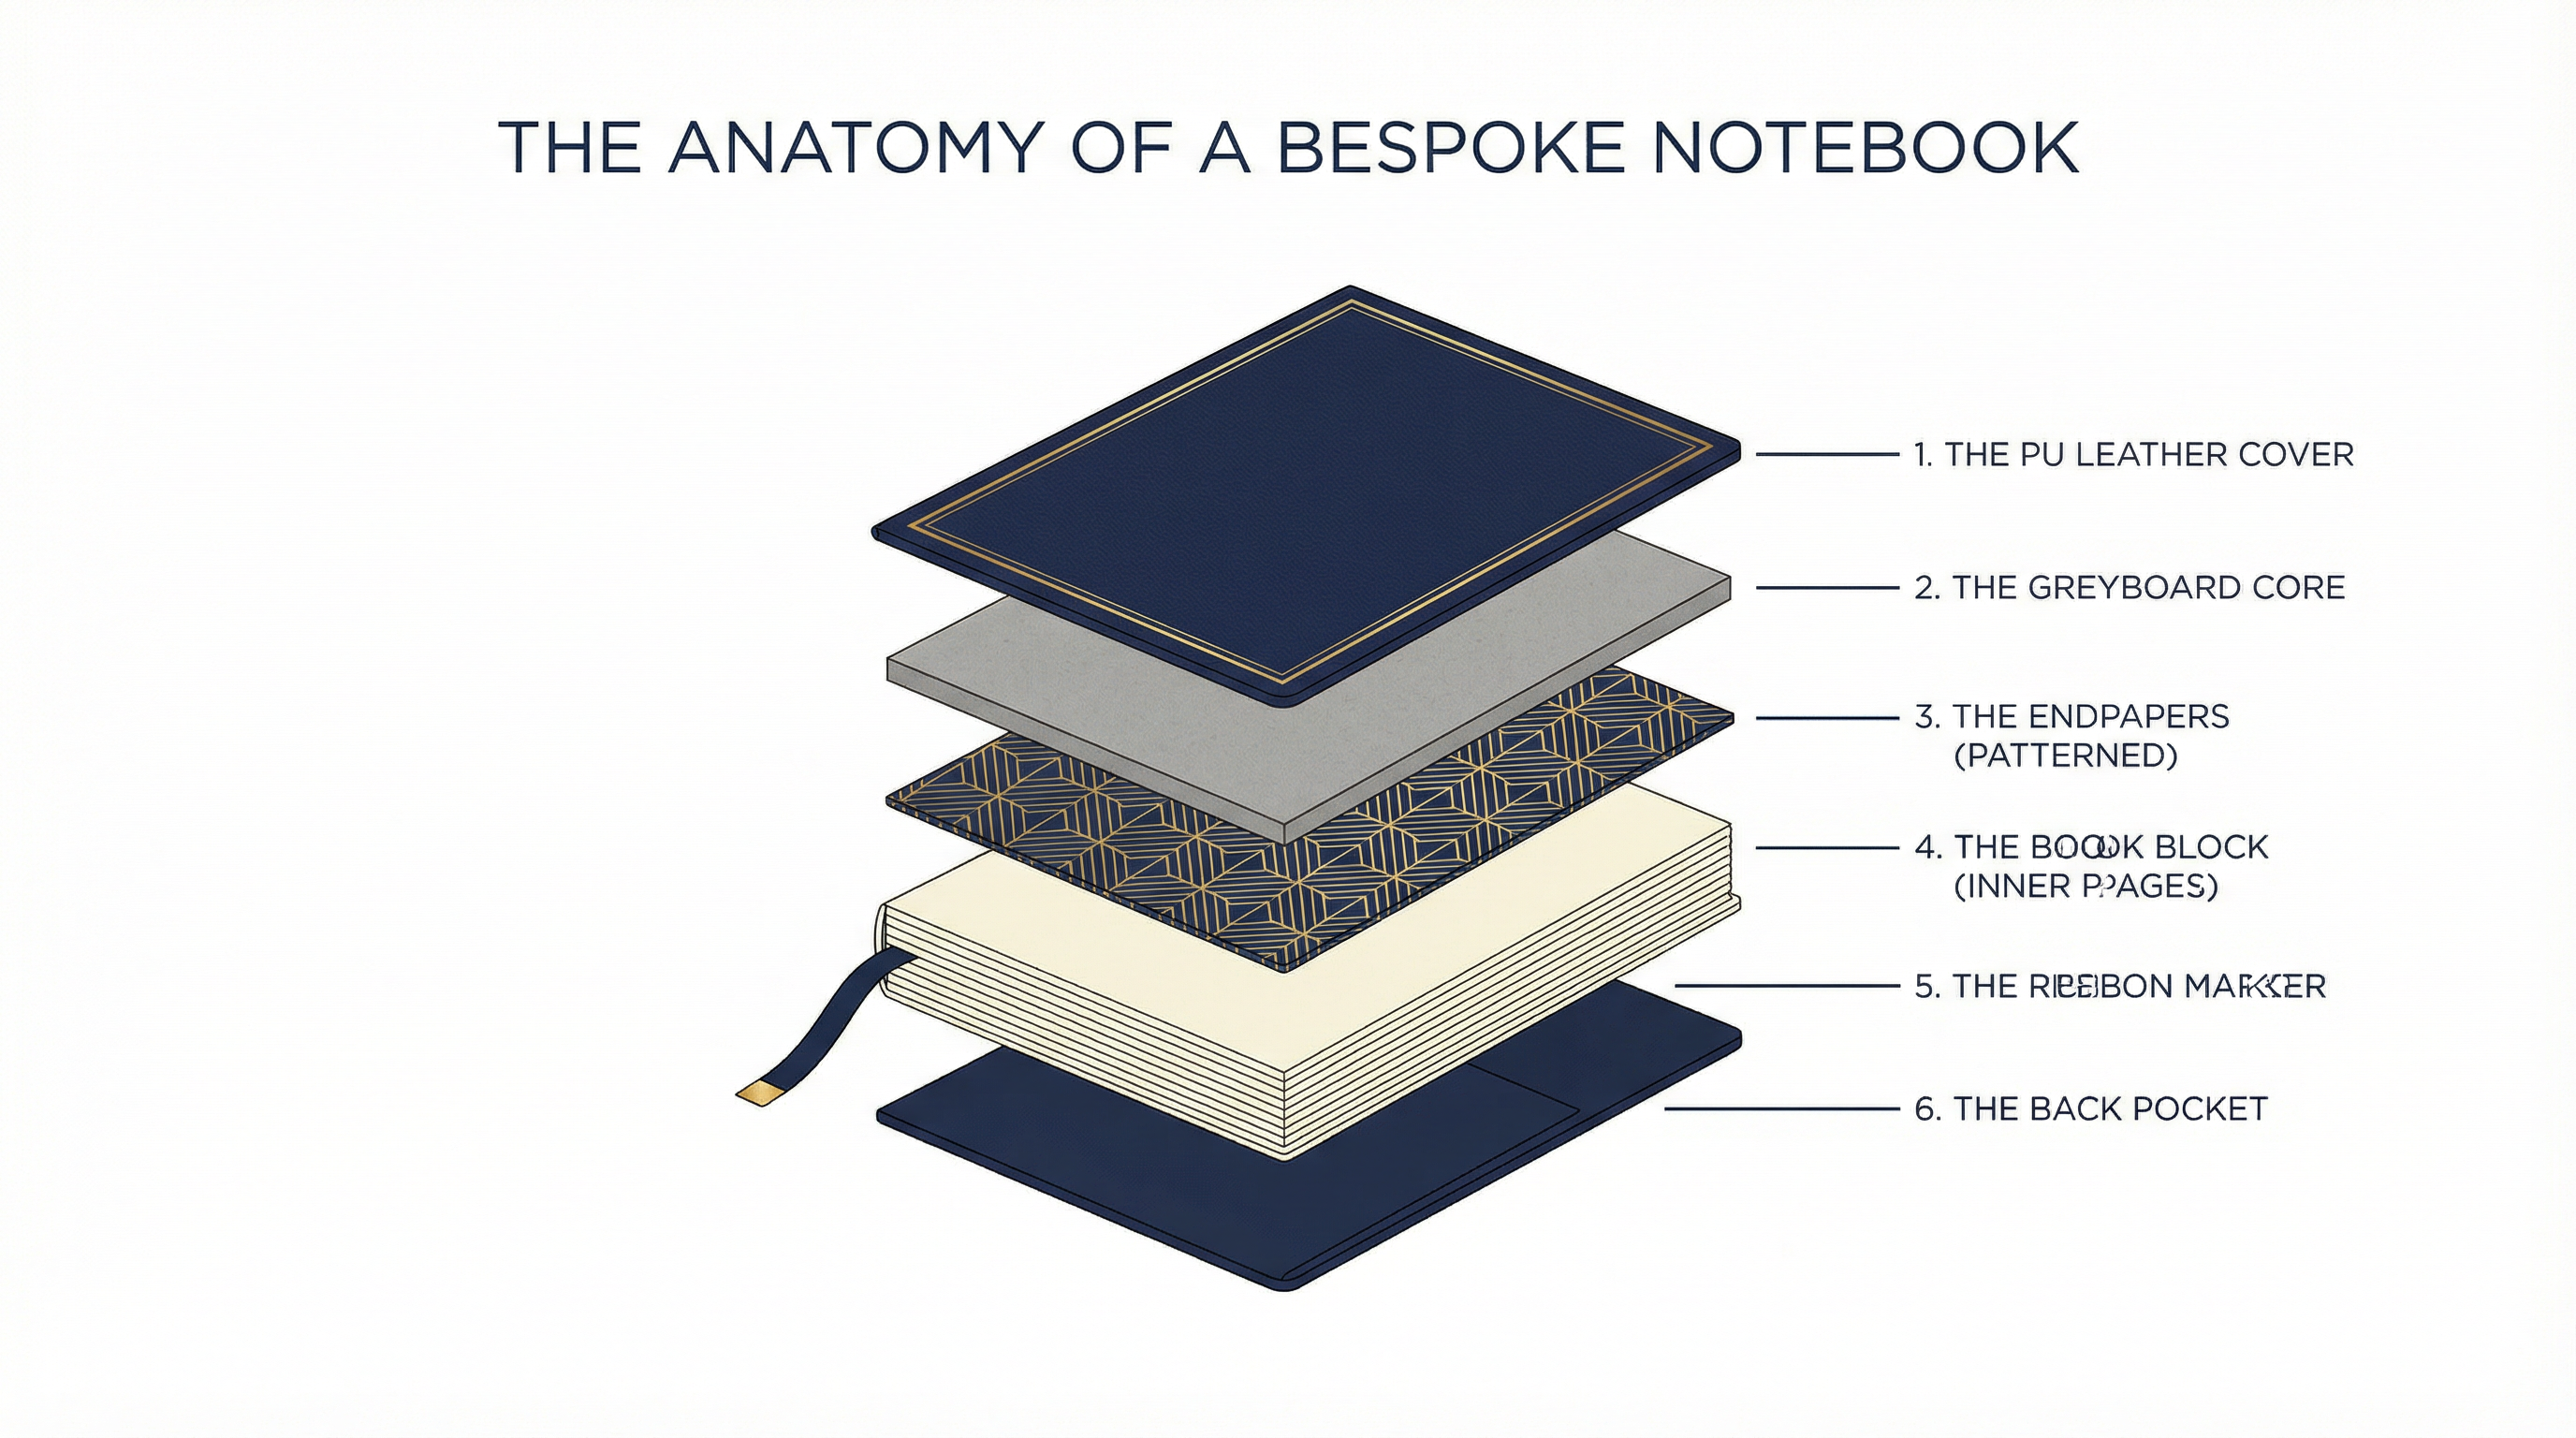
The Anatomy of a Bespoke Notebook
To understand how we customize, you must first understand what we are building. A premium hardcover notebook is not a single object; it is a complex laminate of six distinct layers, each of which can be engineered to your brand's specifications.
1. The Cover Material
Usually PU (Polyurethane) or genuine leather. This is wrapped around the greyboard core. Customization includes texture (grain), color (Pantone match), and finish (matte/gloss).
2. The Endpapers
The heavy paper that glues the book block to the cover. This is prime real estate for brand storytelling—often printed with a company history or values manifesto.
3. The Book Block
The inner pages. Customization ranges from simple logo watermarks on every page to fully bespoke "planner" layouts with custom dates and fields.
4. Accessories (Ribbon & Band)
The elastic closure and ribbon marker. These must be dyed to match your brand colors. Standard factories only stock black/white/grey; we dye to Pantone.
The 6-Stage Customization Roadmap
From the moment you approve the PDF proof, your project enters a rigorous industrial process. This is not "print on demand"; this is manufacturing.
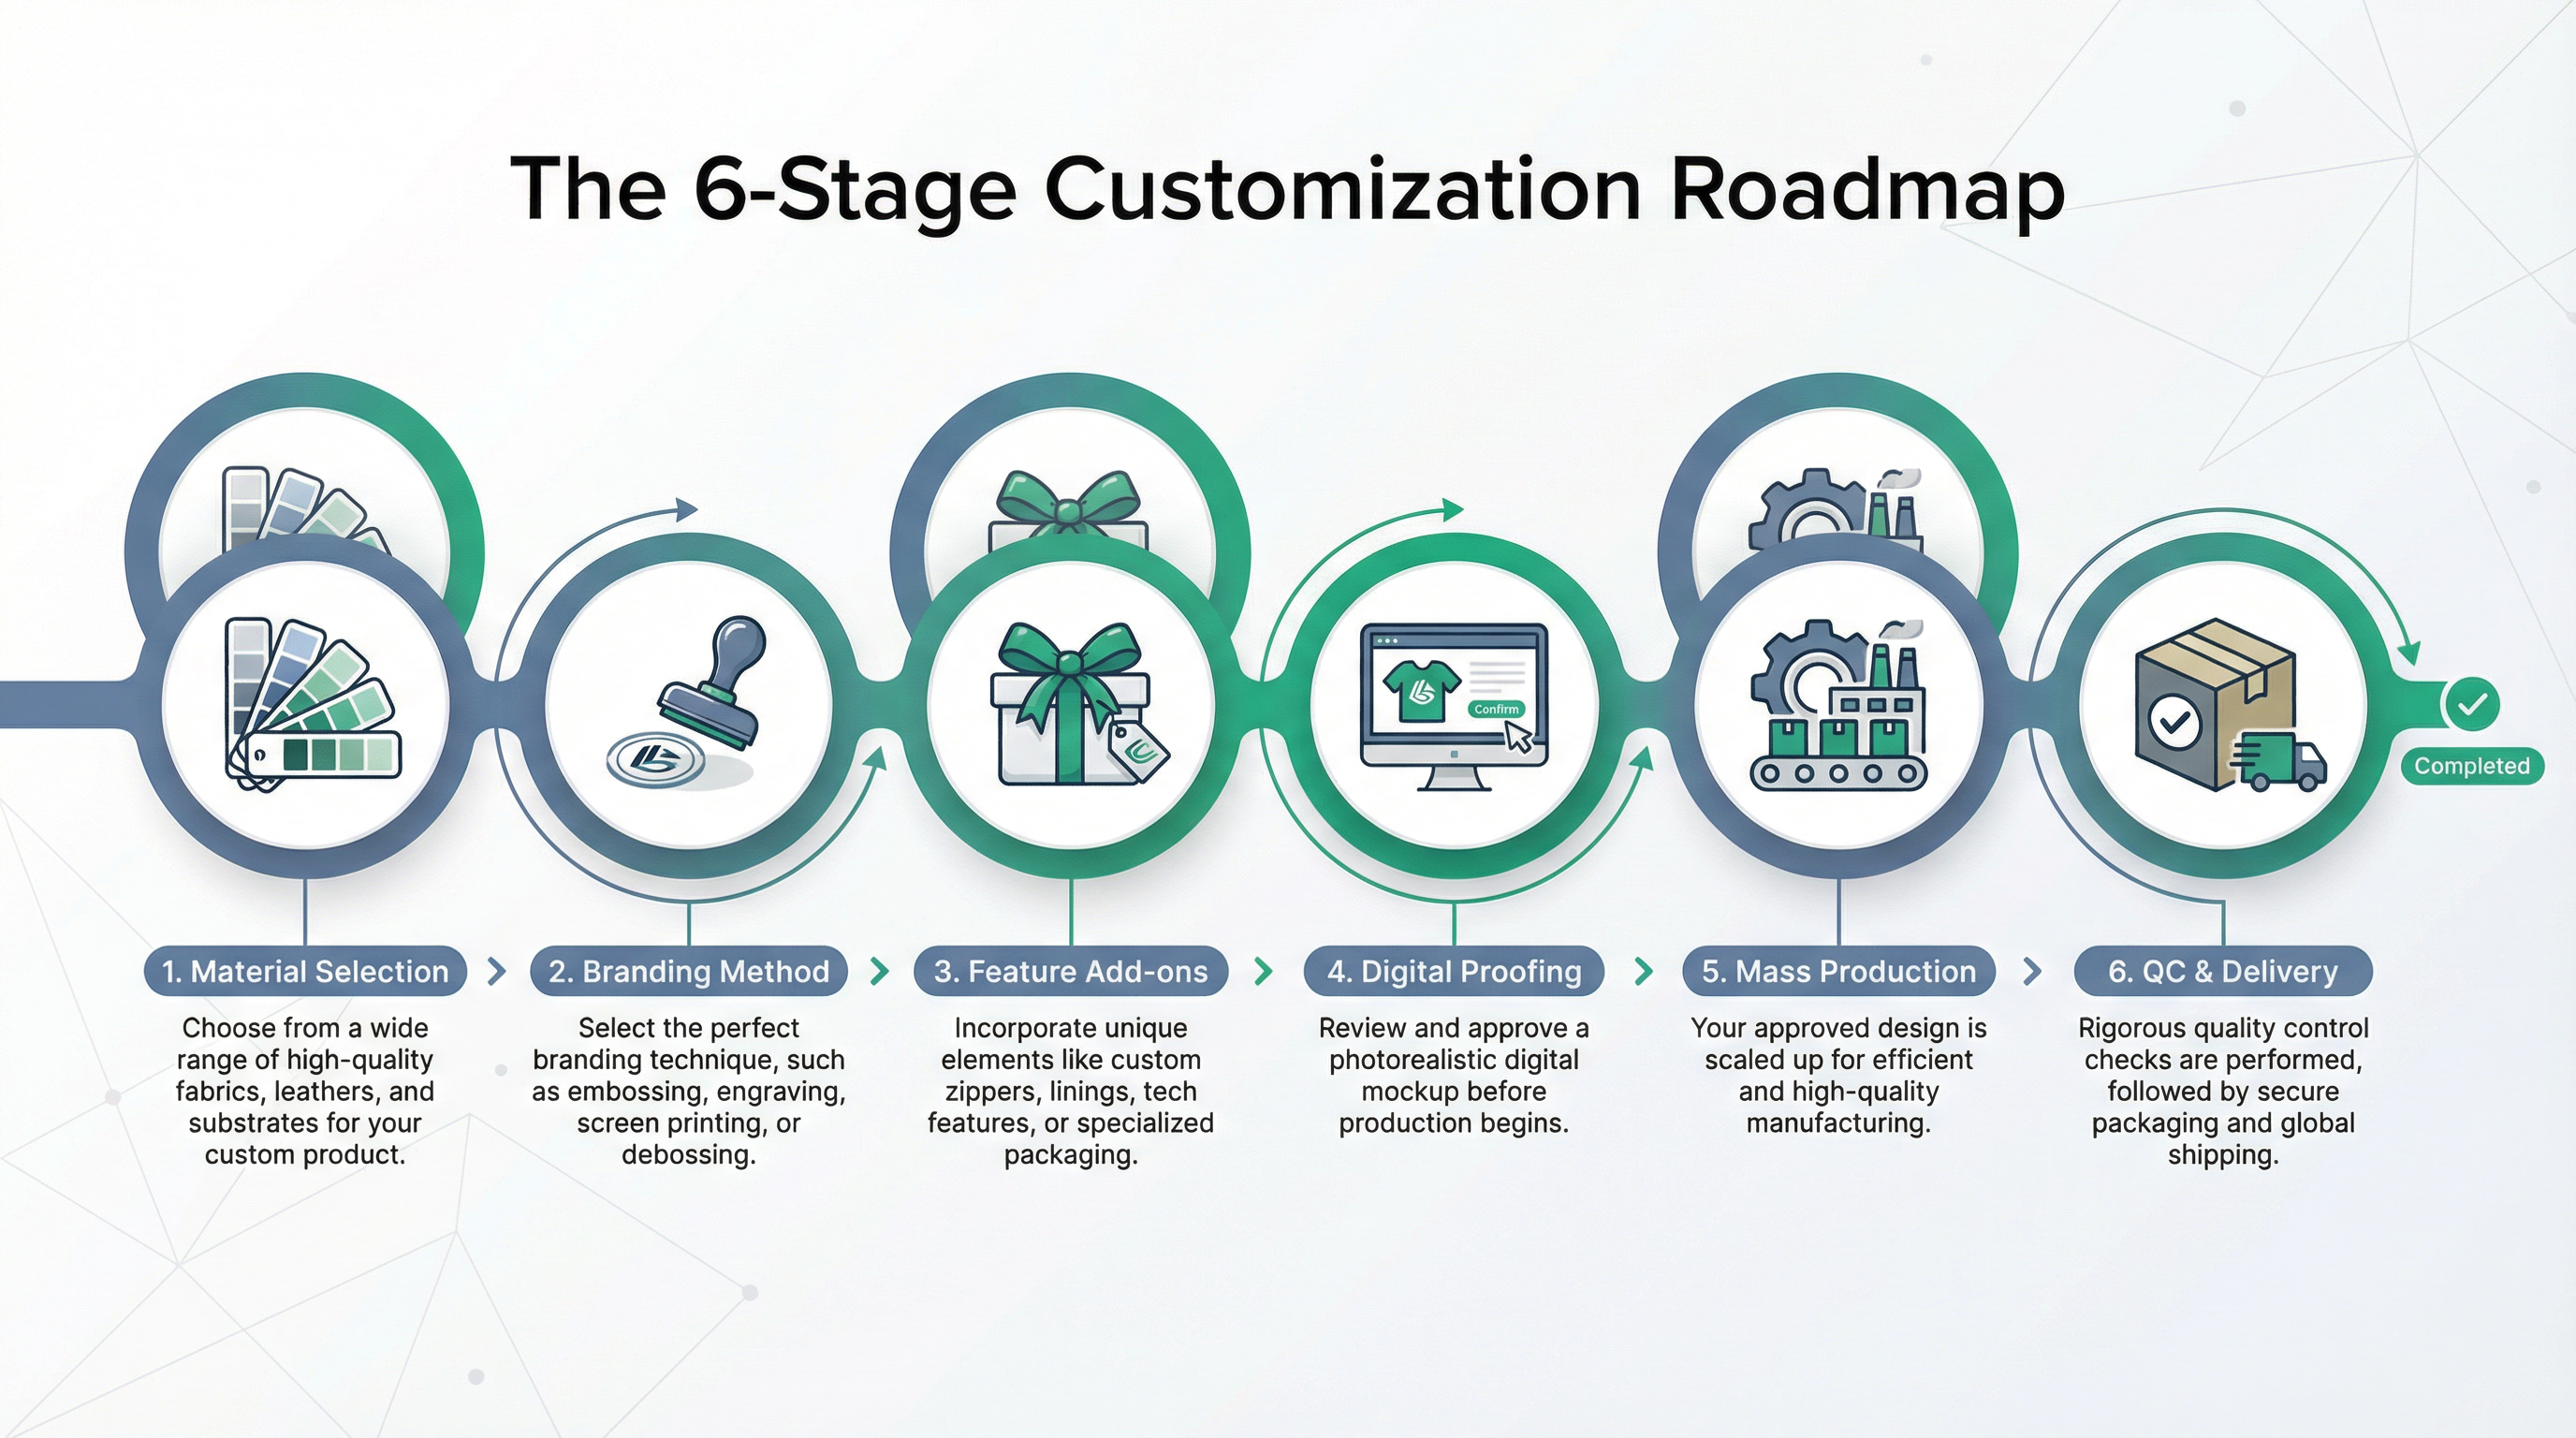
Stage 1: Material Sourcing (The "Lab Dip")
We don't just pick a roll off the shelf. If you need "British Racing Green," we send a swatch to the lab. They mix pigments to match your Pantone code and send back a "Lab Dip" for approval. This ensures your brand color is accurate under different lighting conditions.
Stage 2: The Magnesium Die
For debossing or foil stamping, we CNC-machine a physical block of magnesium or brass with your logo. This die is heated to 140°C and pressed into the cover material. Unlike digital printing, this creates a permanent, tactile 3D impression.
Stage 3: Casing In
This is the marriage of the cover and the book block. Glue is applied, and the book is pressed under 2 tons of pressure for 24 hours. This "curing" time is non-negotiable; rushing it leads to warped covers.
Branding Techniques: Physics & Finish
How do you want your logo to feel? The choice of branding technique changes the physical interaction with the product.
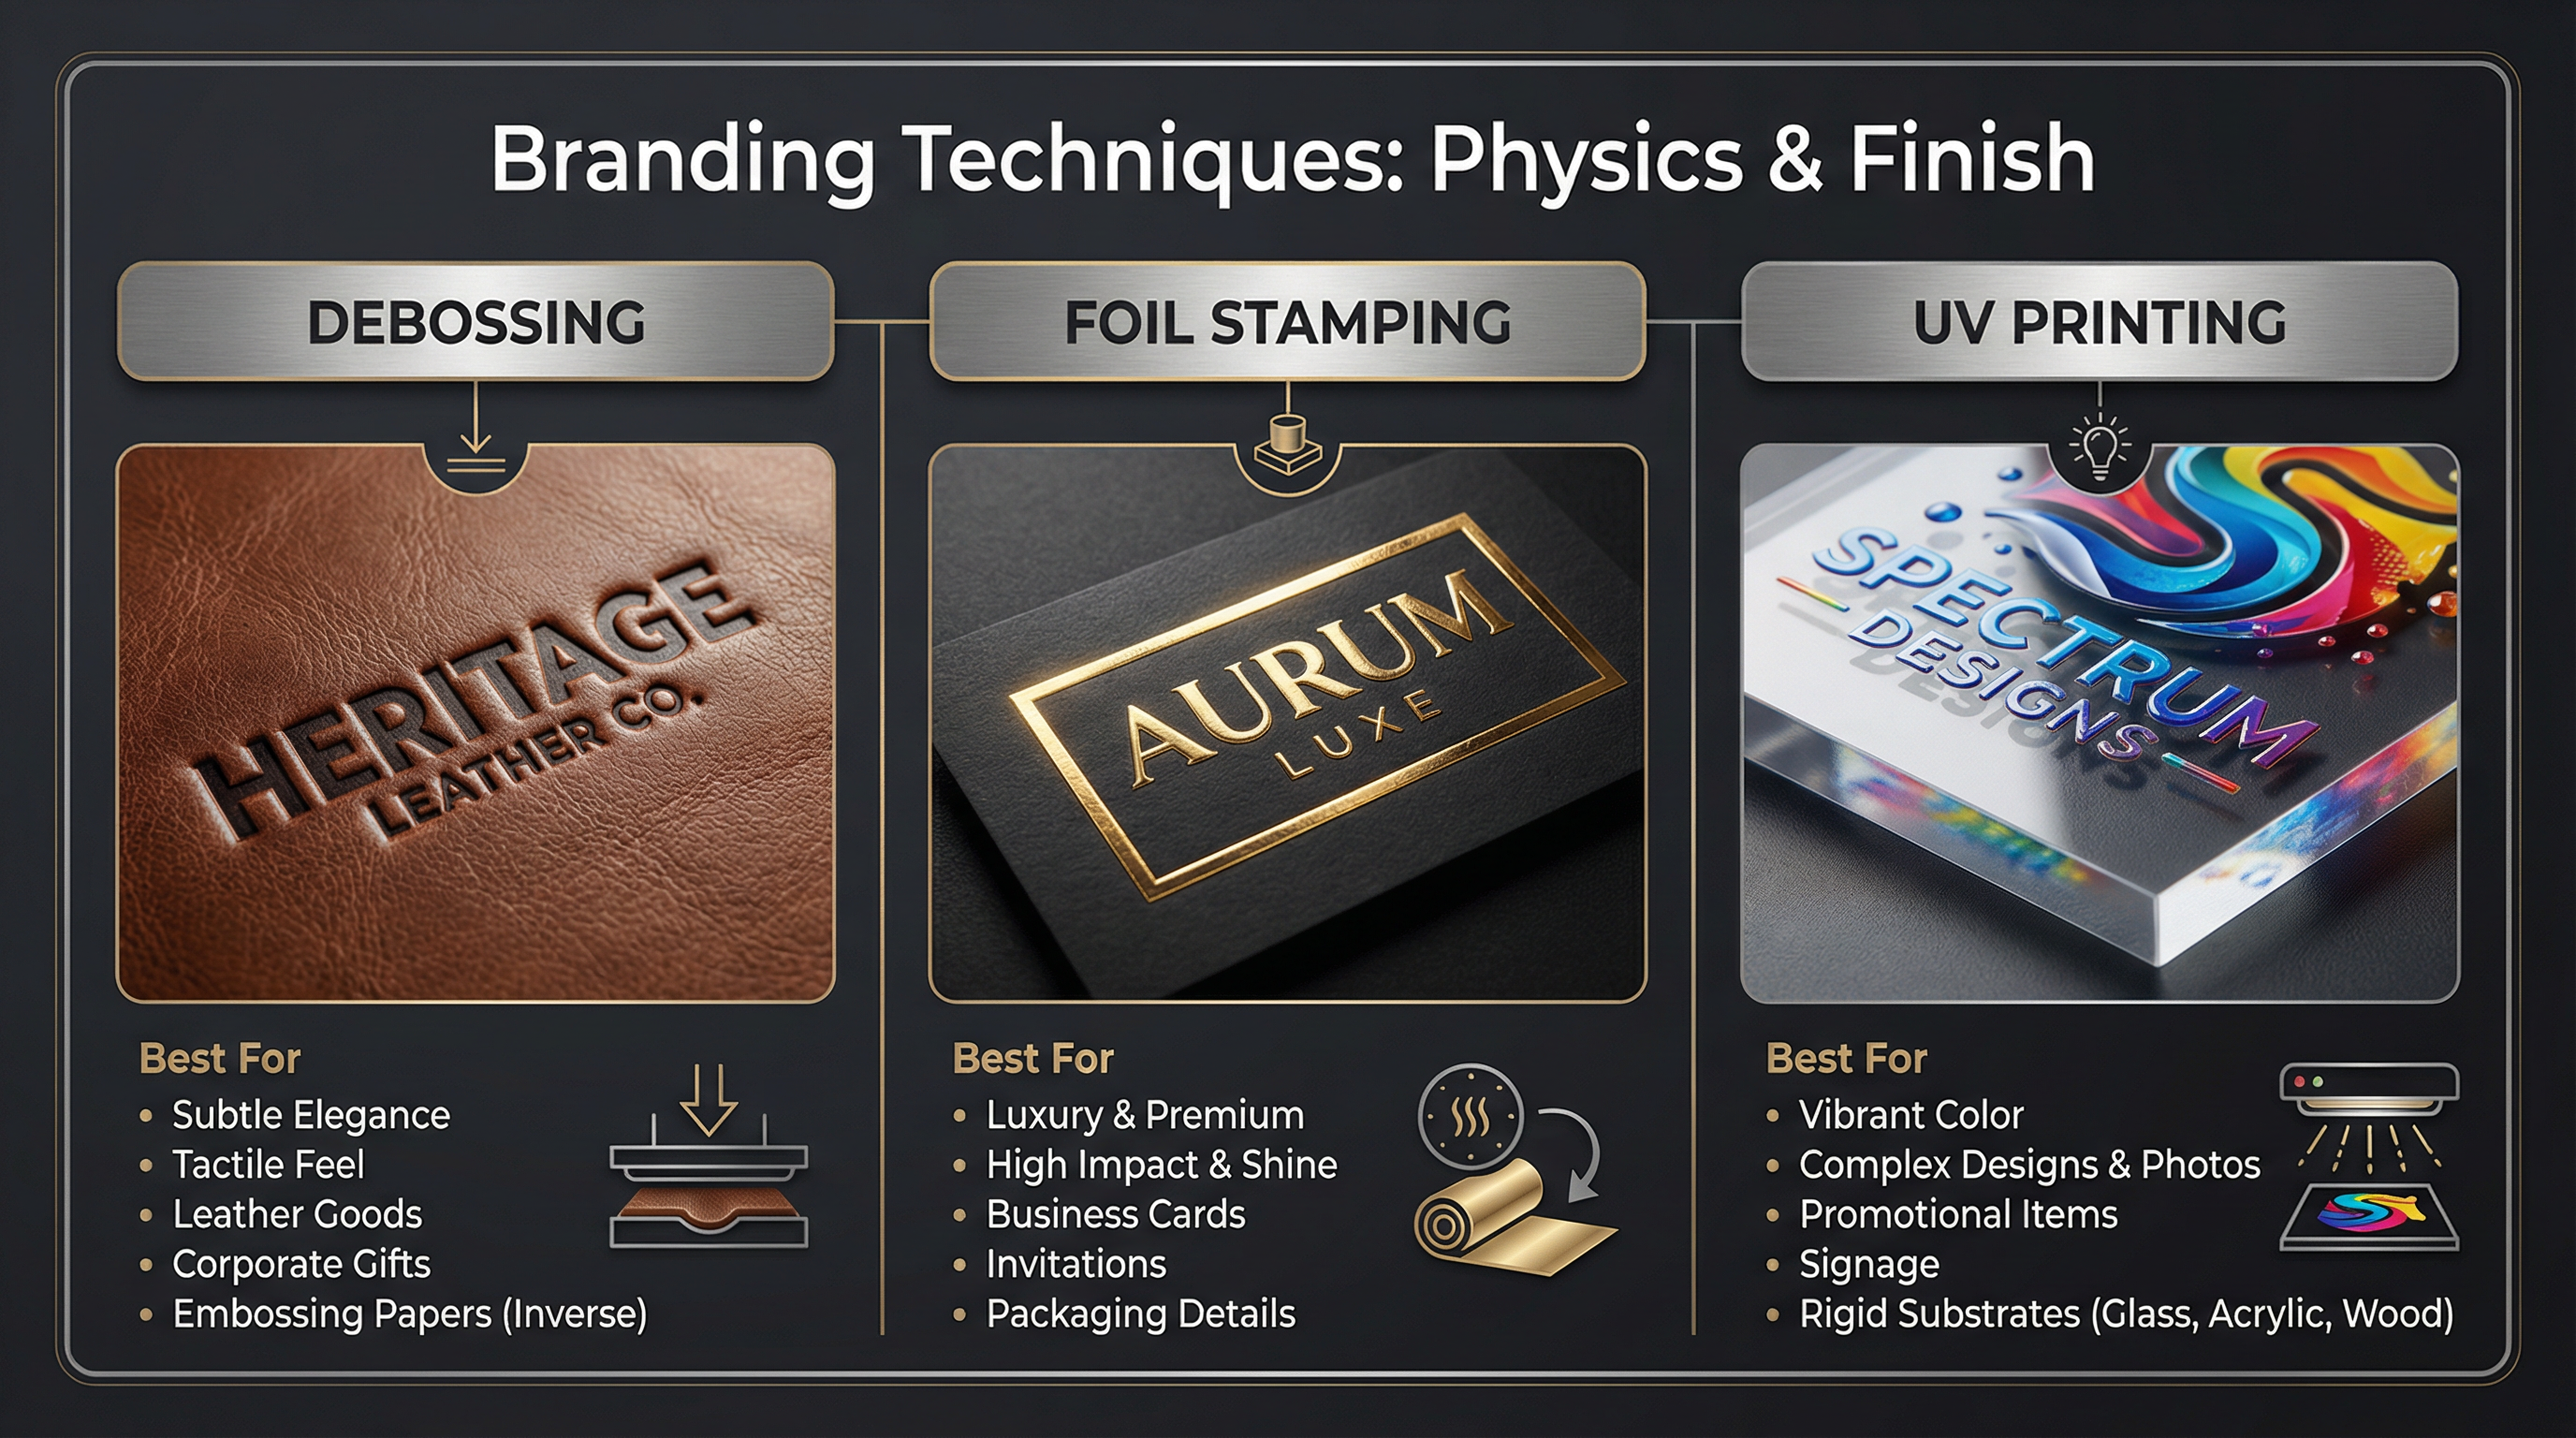
| Technique | The Physics | Best For |
|---|---|---|
| Blind Debossing | Heat + Pressure (No Ink). Creates a sunken 3D effect. | Subtle, professional branding. Leather textures. |
| Foil Stamping | Heat + Pressure + Metallic Film. Fuses gold/silver foil to the surface. | Luxury gifts, awards, high-contrast visibility. |
| UV Digital Print | Inkjet + UV Light Curing. Deposits a layer of hardened ink. | Full-color logos, gradients, complex artwork. |
Common Customization Myths
Myth: "I can print on the edge of the paper anytime."
Reality: Edge printing (spraying the sides of the book block) must be done before the cover is attached. You cannot add edge printing to a finished stock notebook without ruining the cover.
Myth: "Pantone matching is exact."
Reality: Pantone 289C looks different on coated paper vs. uncoated paper vs. textured leather. Texture absorbs light, making colors appear darker. We always aim for a "commercial match" within 2 Delta-E.
Ready to Build Your Bespoke Notebook?
Now that you understand the process, let's start the design. Our team can guide you through material selection, die creation, and the final proofing stages.
Start Your Custom Project